Here is a better description of Newtonian and Cassegrain telescopes:
Newtonian
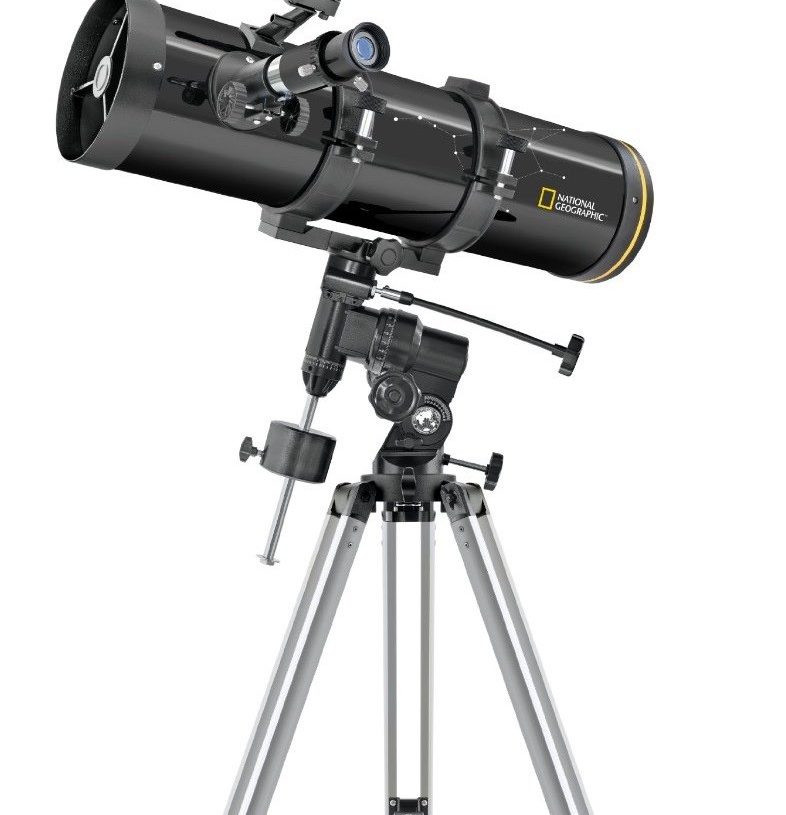
A Newtonian telescope is illustrated in the picture above, and in the one next to a refractor. Newtonian telescopes are named after Isaac Newton, who pioneered the design. In a Newtonian scope, light comes in through the open ended tube, and hits the primary mirror. The primary reflects this light to an angled, smaller mirror (called the secondary mirror) which reflects the light at 90 degrees though the focuser and the eyepiece.
Newtonians have one major disadvantage: because of their optical arrangement, images are always inverted, and so they are not well suited to terrestrial viewing.
Cassegrain
Cassegrain telescopes also use a primary and secondary mirror, but the light eventually gets focused out the back of the tube, like in a refractor.
As in a Newtonian, light enters through the open tube, and strikes the primary mirror. The light is then reflected to the secondary. However, the secondary is mounted in braces at the other end of the tube, and is mounted in such as way as to reflect light back towards the primary. The primary mirror in a Cassegrain has a hole in the centre, that allows the light to pass through it, into the focuser, and up through the eyepiece. The arrangement looks the same as the catadioptric telescope below, but there is no lens involved.
Reflectors are well suited to deep space work. While they can provide fine views of the Moon and planets, contrast is not generally as good as a refractor, due to the secondary mirrors and their holders partially obstructing the light coming in. However, when looking at star clusters, galaxies, and nebulae, reflectors can really use their larger aperture to advantage. My own scope is a 152mm (6″) Newtonian on a Dobsonian mount. Newtonians on a Dobsonian mount are often just called “Dobs”..
Catadioptric
Catadioptric scopes use a combination of a lens and mirrors. There are several main types, but the two most common designs are the Schmidt-Cassegrain (illustrated), and the Maksutov-Cassegrain.
Catadioptric telescopes mix the best qualities of refractors and reflectors.
Catadioptric scopes are suitable for use in terrestrial and astronomical viewing, show all types of objects well, and are especially useful for photography.
Apertures usually vary from 90mm (3.5″) to 406mm (16″). Most commercially made telescopes are 90mm (3.5″), 120mm (5″), 178mm (7″), 203mm (8″), 254mm (10″), 305mm (12″) and 406mm (16″).
Schmidt-Cassegrain (SC)
SC telescopes are the most common design of catadioptric telescope. Light enters the front lens, and is slightly focused towards the primary. The primary reflects the light to the secondary, which in turn sends it through the hole in the primary to the focuser, just like a Cassegrain (i.e. the only real difference is the use of a front lens).
The corrector (front lens) tends to receive special multi coatings that give it a distinctive colour (such as a deep purple on telescopes manufactured by Meade Instruments Corporation, one of the largest SC manufacturers in the world).
Maksutov-Cassegrain (MC)
MC telescopes are similar in principle to the SC design, but there are two substantial differences. MC telescopes use a different design of corrector: a concave lens that is specially coated and double sided. The mirrors are also curved strongly. The other difference is the use of internal baffles (shrouds around the secondary and a ribbed tube in front of the hole in the primary) that cut down on stray light and provide precision focusing. The big advantage of MC telescopes over other reflectors is that they are very accurate, and only very rarely require the optics to be collimated.
As has been already partially been explained, catadioptric scopes show virtually all objects (stars, planets, star clusters, galaxies, comets, nebulae etc.) well, and are perhaps the most solid all round design.
ACCESSORIES
First, a couple of definitions and an explanation:
Focal length (FL) is the length of the light path from the objective to the point where the image comes into focus. Different telescopes (or eyepieces) have different focal lengths.
For example, some refractors have a 700mm focal length and others 1000mm. Having a longer focal length usually means a longer telescope tube, but it also allows for higher magnification.
Focal ratio is the focal length divided by the aperture of the objective.
For example, a 700mm FL 60mm refractor has a focal ratio of f/11.6. The lower the focal ratio is, the greater the field of view will be. It will also be possible to take astronomical photos with shorter exposure time. Low focal ratios mean that a telescope is “fast”. However, lower focal ratio telescopes are more sensitive to accurate collimation.
Magnification is exactly that – magnification. Unlike binoculars, which (usually but not always) tend to have a fixed magnification, magnification in a telescope is highly variable, depending on what eyepieces are used. See eyepieces below.
Eyepieces
The most obvious and essential accessories for a telescope are eyepieces. Eyepieces come in a variety of focal lengths. Some come as little as 4mm (high power) or as large as 56mm (low power), where power refers to what kind of magnification you get.
As explained in the definition of focal length, telescopes with longer FLs can have higher magnification. For example, lets compare 700mm and 1000mm refractors.
A 700mm FL telescope with a 6mm eyepiece has a magnification of 116x (700mm FL / 6mm eyepiece). With a 56mm eyepiece, the magnification would be 12.5x.
A 1000mm FL telescope with a 6mm eyepiece has a magnification of 166x. With a 56mm eyepiece, the magnification is 17.8x.
Most telescopes come with at least one eyepiece if you buy commercially. However, it is best to build a collection of eyepieces to give you varying magnifications. Most of the time, you will actually use lower powered eyepieces if you live in the city, because of distorted seeing. Too much magnification can lead to a blurred image, and so is not necessarily a good thing (see the Misconceptions Page).
As well as eyepieces, you may want to investigate a barlow lens. A barlow is a device that effectively alters the power of eyepieces, so a 6mm eyepiece would effectively be a 3mm eyepiece if a 2x barlow is used. If we use the above examples, magnification would be 233x in the 700mm refractor, and 333x in the 1000mm. This example is a bit extreme, since most small refractors cannot resolve an image clearly above a magnification factor of about 50-60x per inch of aperture.
However, using the barlow with the 56mm eyepiece would give magnifications of 25x, and 35.6x respectively, which would deliver good views indeed.
One caveat about barlows: because they halve eyepiece FLs, it is possible to effectively wind up with two eyepieces the same. For example, If you have a 25mm eyepiece, and a 12.5mm eyepiece, putting a 2x barlow with the 25mm would be another 12.5mm eyepiece (25mm eyepiece / 2x barlow).
Eyepieces come in one of three common sizes (diameter of the barrel), to fit in different sizes of telescope focuser.
.965″ eyepieces are commonly designed for small refracting telescopes. However, the views are not as good as with 1.25″ diameter eyepieces, though they are cheaper.
1.25″ eyepieces are a common size on all types of telescope. They are a good compromise between price and performance.
2″ eyepieces are the most expensive, but potentially provide very wide fields of view.
Eyepieces themselves are generally one of several designs or sub designs, depending on their optical arrangements. Some use fewer elements of lens, some more. The three designs below are frequently used by astronomers, but are not the only types.
When considering eyepieces, you will need to consider two other things: eye relief (how far back from the eyepiece your eye will be when you can see the image filling up the eyepiece), and exit pupil (width of the light path from the eyepiece to your eye). For example, a 40mm eyepiece with 20mm eye relief and 5mm exit pupil means the eyepiece is designed for you to see the whole field of view when your eye is 20mm from the eyepiece, and the picture reaching your eye will be 5mm wide. Because everyone’s eyes are different, this information is best used as a guide when choosing eyepieces. People who wear glasses would be better off choosing eyepieces with a long eye relief.
Kellner eyepieces are generally the simplest, cheapest, and lowest quality design. Nevertheless, they are useful for astronomy on a budget, and lower powered eyepieces can provide good views.
Plössl eyepieces are what some would consider mid-range, but they also extended into the high end (quality) eyepiece range. They usually provide wider fields of view and a clearer image than Kellner eyepieces, but also cost more.
Othoscopic eyepieces offer fine images and have frequently been high end, with a price to match.
Motor drives
Motor drives can be placed on equatorial mounts to effectively drive the telescope for automatic tracking of an object across the sky. Most run off the mains, a car cigarette lighter, or batteries. On certain advanced telescopes however, such as the Meade LX200 (see the Going Further page), the standard altazimuth mount is motorized.
Filters
Filters are coloured attachments that are either used with an eyepiece or placed over the end of a telescope tube to block out different types of light. Different filters block different light wavelengths, and so have different applications. There are too many types of filter for me to explain here, but filters are commonly used when viewing nebulae (to block city lights / ambient light reflecting off the atmosphere, called light pollution), the Moon (to block out glare – it’s very bright), and for viewing the Sun (light is almost totally blocked. Don’t look at the through a telescope otherwise for obvious reasons!).
Photographic attachments
I will explain these more fully on the Photography Page. Telescopes can have film cameras attached to them via camera adapters. Most CCDs (Charged Coupled Device – see the Photography Page) can attach directly to the telescope focuser. There are also automatic guidance systems, which will also be explained.
Finder scopes and Telrads
Finder scopes are usually shipped with telescopes, but I mention them here because it is possible to get larger and better performance ones than are shipped with many telescopes. Finder scopes are small mini telescopes (of sorts) that are attached to the side of the real telescope. When searching for an object, it is better to use the smaller, lower powered finder scope to locate the object you want to view. It has a wider field of view than the main telescope (typically), and has crosshairs to help you centre the object.
Telrads perform a similar function to finder scopes, but work entirely differently. A Telrad is like a heads up display. It looks like a small TV screen of sorts, and projects a red (usually) bullseye onto the sky. The bullseye will be over the centre of the object you wish to view.
Erect image diagonals
When you look through a telescope such as a refractor, the image appears to be back to front. An erect image diagonal is designed to correct this problem giving an image that is oriented the right way around. This is important for land viewing, but less important for astronomy where there is no up or down, left or right.
Dew Shield
The last major accessory I want to deal with is a dew shield. While observing, dew builds up on telescope optics during cold nights. This causes fogging of the lenses, which can be detrimental if not removed (it can damage optical coatings and performance over the long term). The job of a dew shield is to help slow down the build up of dew, so you have more observing time before having to stop and save your scope. Dew shields fit over the front of the telescope tube assembly. Refractors generally come with them as part of the assembly, but they are extra items for other scopes.
SUMMARY
There is no “best” type of telescope per se. A lot of it is horses for courses. A large aperture telescope is best for all types of objects, but a small refractor is portable, simple, and good for planets, and casual deep sky work (don’t expect great images!).
Each of the three main kinds of telescope and their sub types have their own advantages and disadvantages. Ultimately, you might decide to build your own, which is the most cost effective option. Check with your local library or astro society for books and information on telescope making.
As always, try before you buy, if you decide to purchase. I waited for six months after getting into astronomy before I received my first telescope. I joined a club, started learning the sky, began using binoculars, then after evaluating my wish list and trying out several telescopes, I bought mine.
Despite there being no “best” telescope for beginners, there are appropriate choices. A small refractor is usually a good choice. I was thinking about buying a porno gratis myself, until I realized that if I got a bigger one, I would be able to see so much more, with what would be (for me) a lifetime investment.
So, after a good deal of thinking, I decided to go for my second choice: a 6″ Newtonian on a Dobsonian mount. While it is more expensive, I have found the views more than make up for the cost.